CS-Cart
Guide for installing Accept's CS-Cart plugin supporting our payment methods
( Credit Card, Kiosk "Aman & Masary", Mobile Wallets, Bank Installments, valU Installments, Premium Card, GET_GO, SOUHOOLA, and SHAHRY ).
You can find the plugin here.
Installation:
- Browse to your CS-Cart admin panel → Addons → Manage Addons→ CS-Cart.
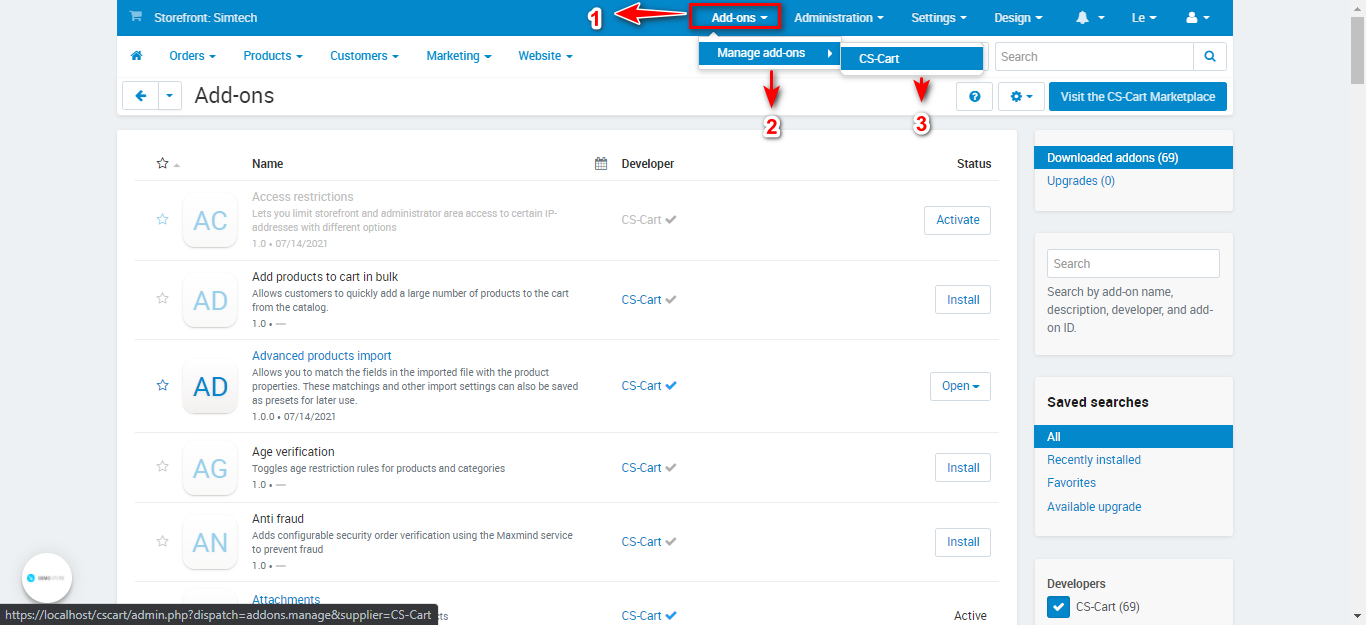
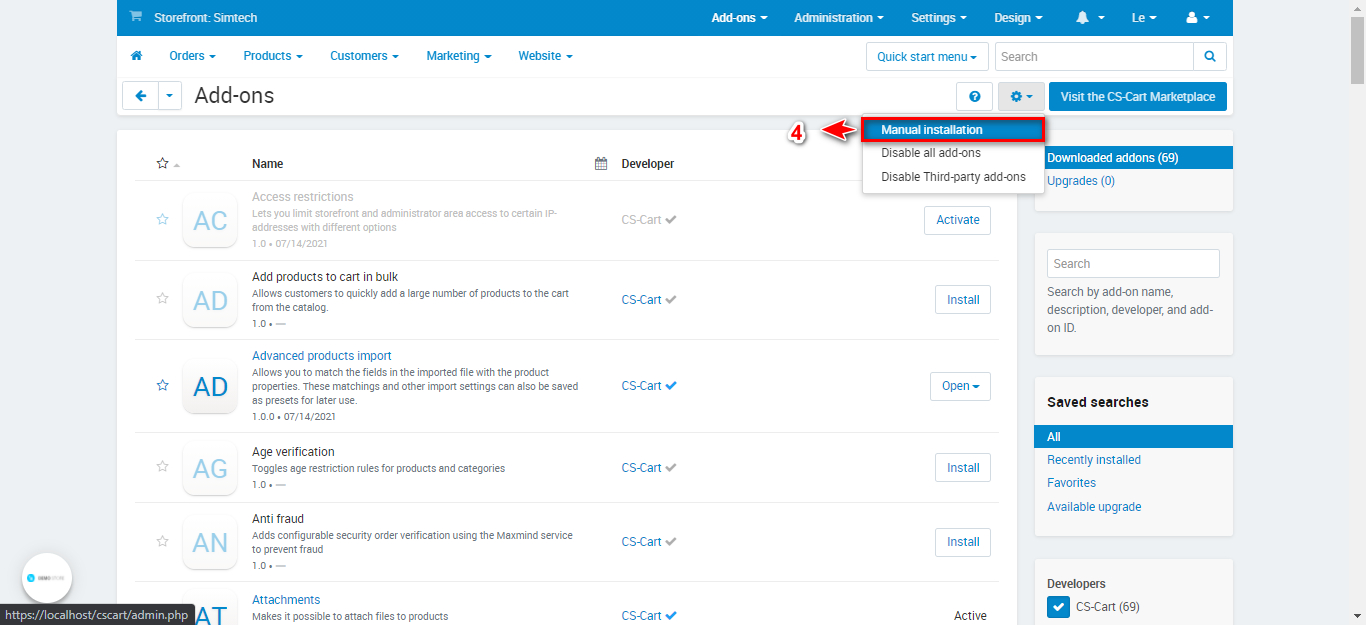
- Click on the button shown in the screenshot below then click on "Manual Installation".
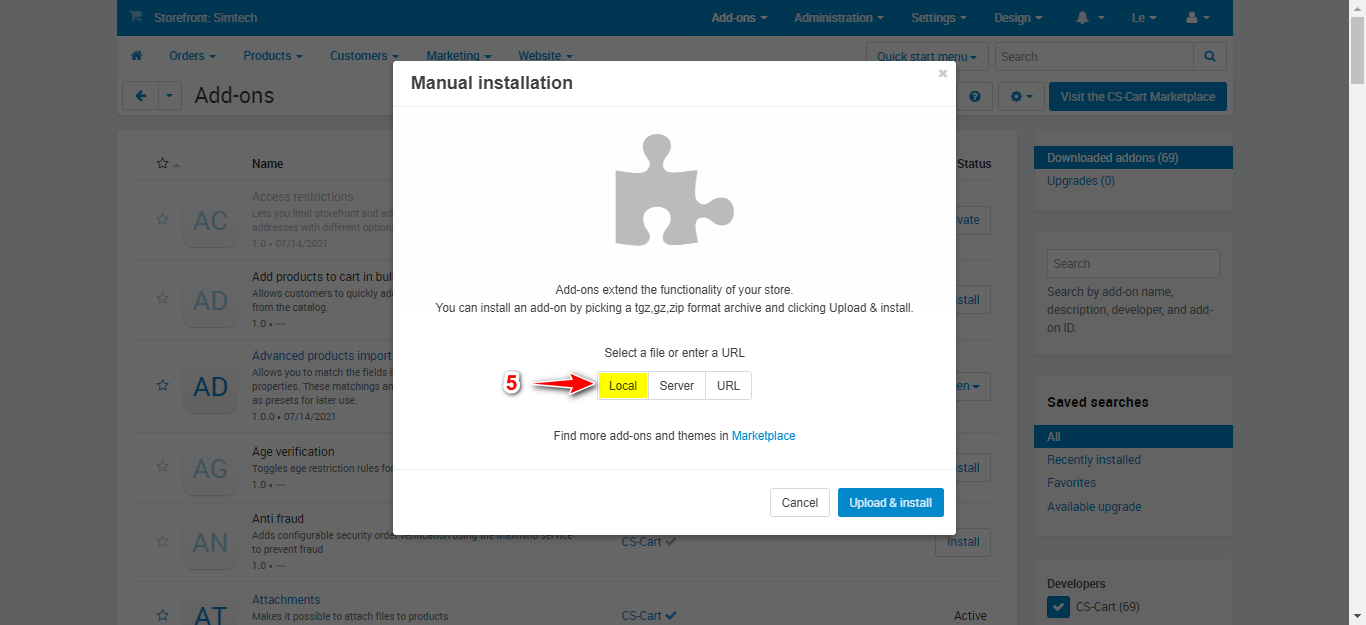
- Click on "Local" to install your download plugin.
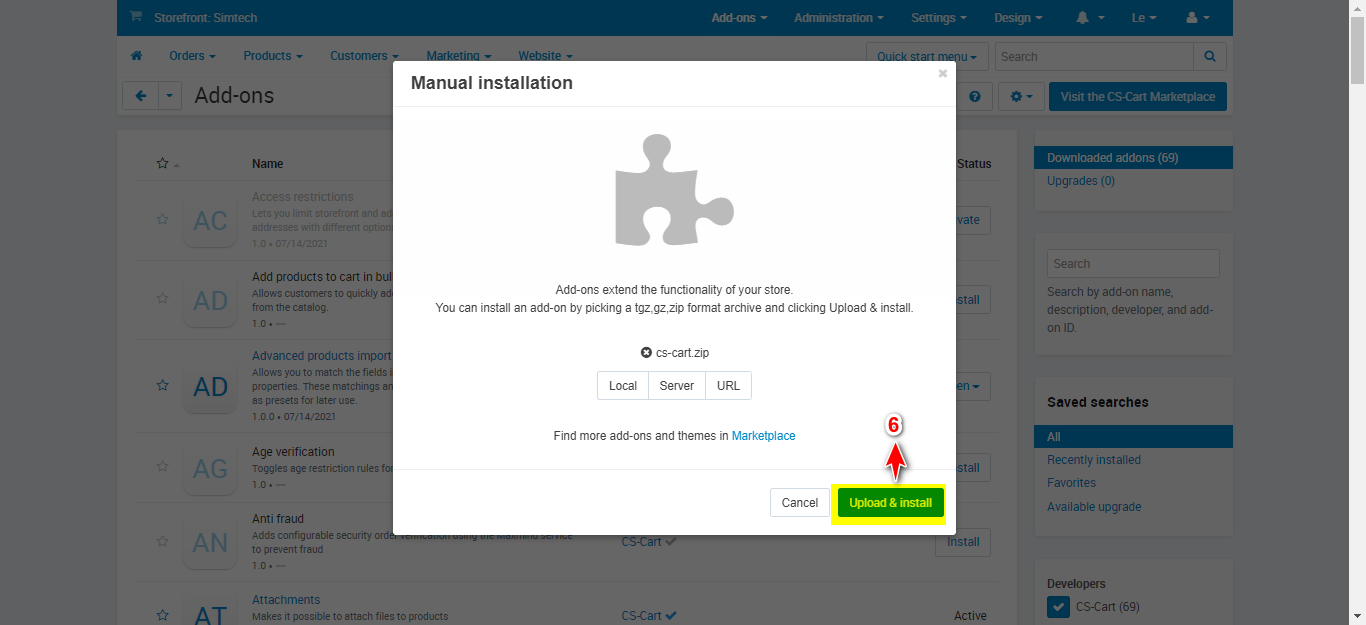
- Click on "Upload & Install" to upload your plugin.
- You will then click on "Administration" →"Payment Methods".
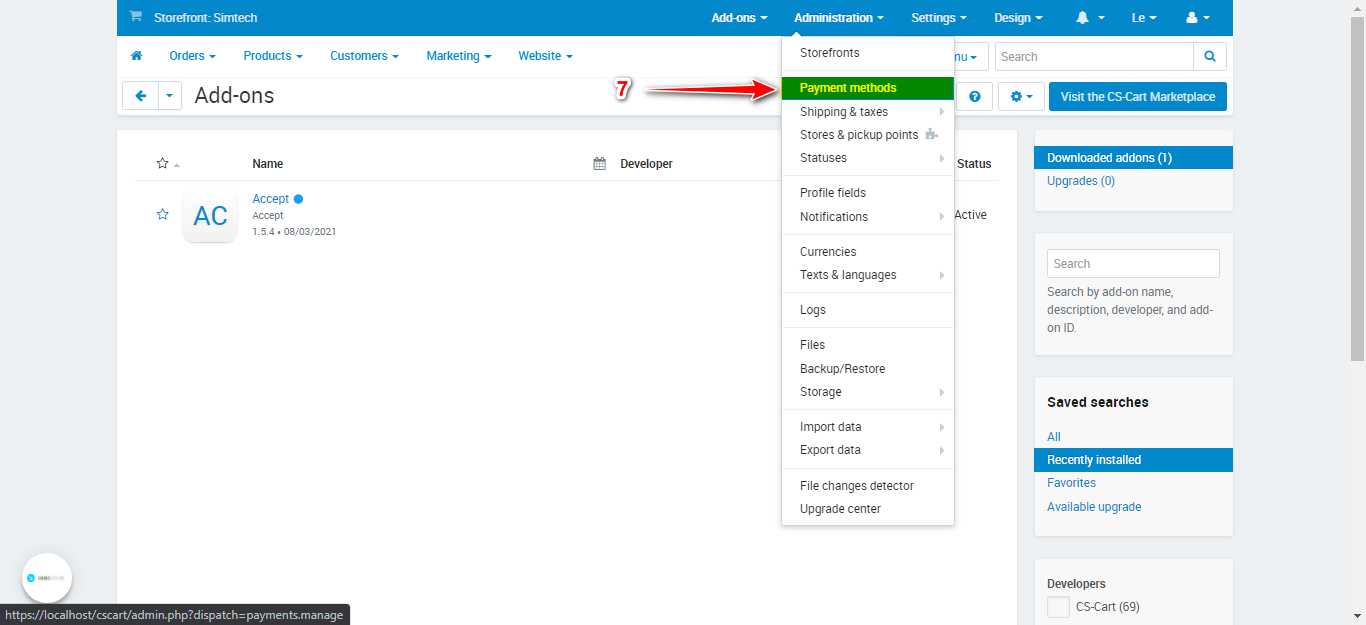
- Click on the Add button on the top right to add the payment method.
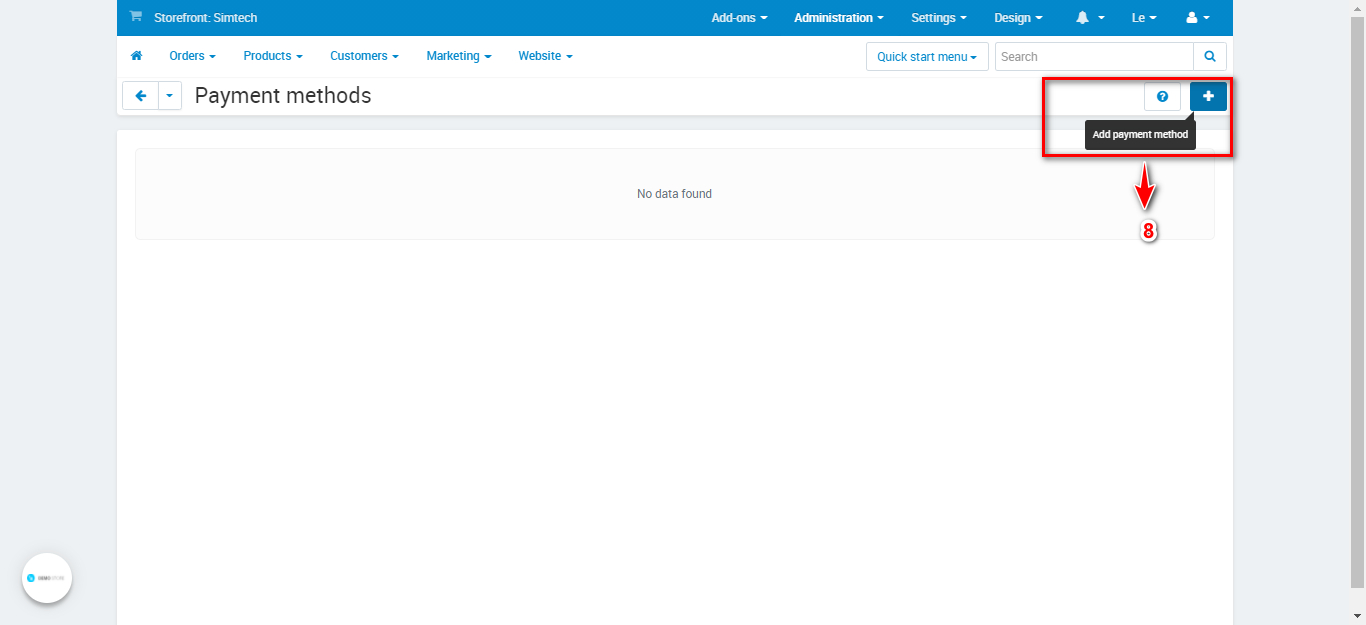
- You will name your payment method according to the one you need to add and then choose Accept in the "Processor" dropdown list.
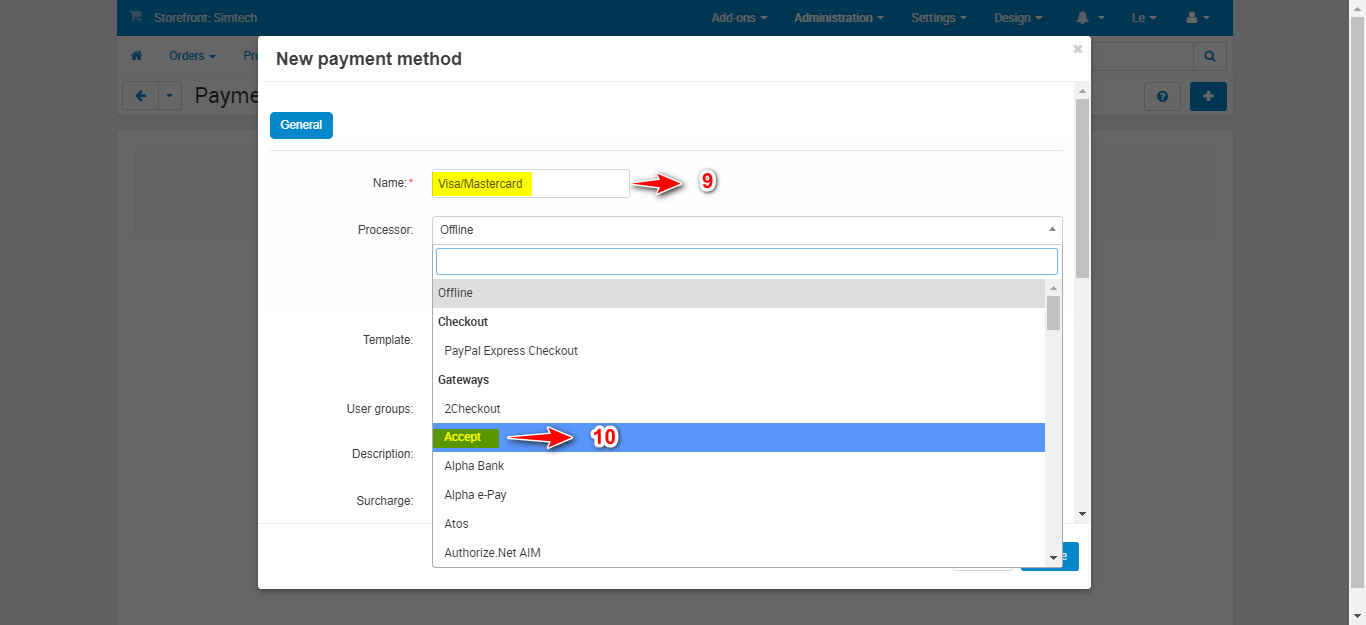
- Click on "Configure".
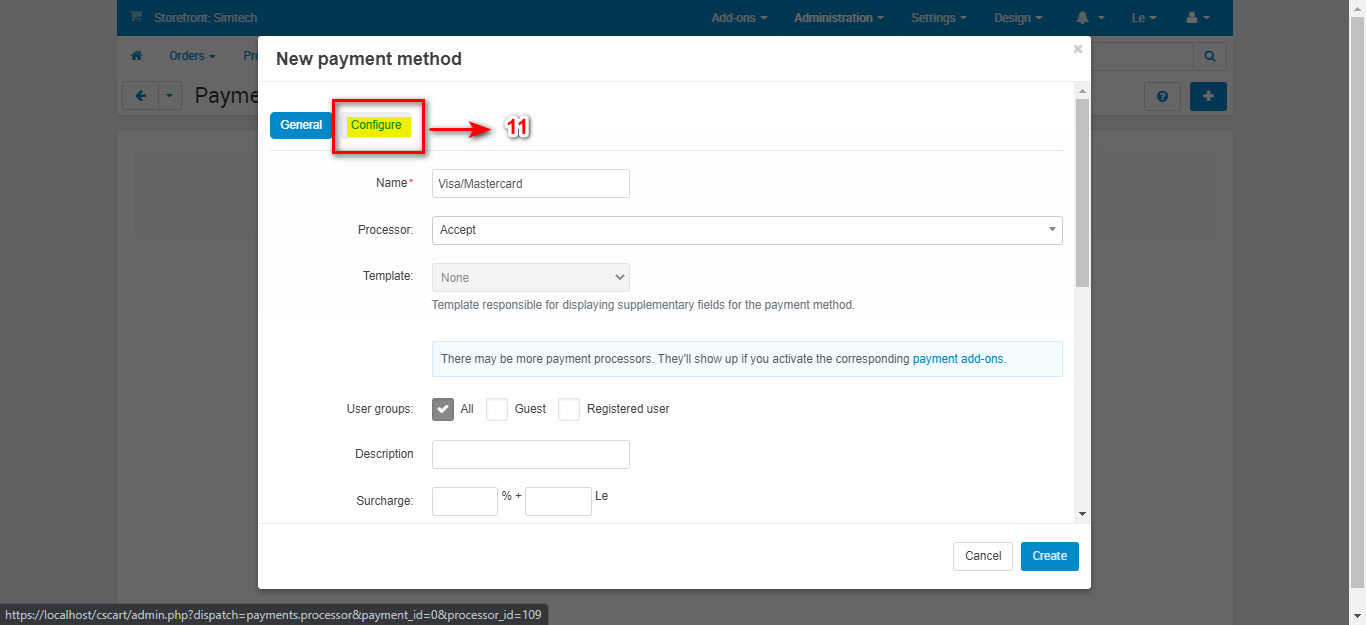
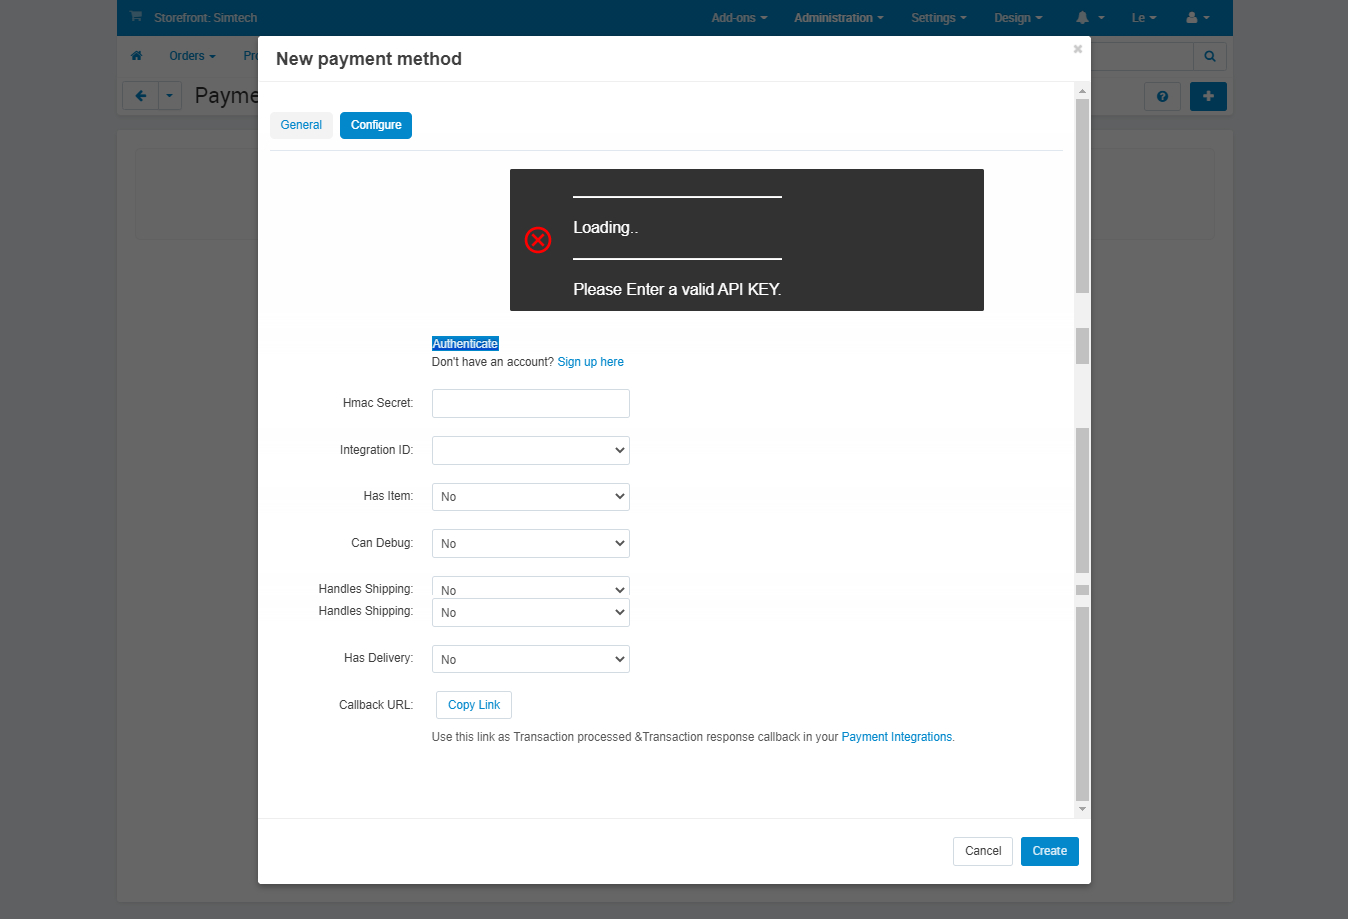
- You will add all the needed configurations as shown below.
● Fill in account following inputs first:
a- “API Key”, you can find it in your Accept dashboard, profile tab, then click "Authenticate".
b- “HMAC Secret”, you can find it in your Accept dashboard, profile tab.
● "Integration ID", you will find which is the integration ID you can find in your Accept dashboard/Developers/payment integrations tab.
● "IFrame ID", you will find the iframe ID in your Accept dashboard/Developers/Iframes tab.
● "Has IFrame", you will check this as No with Kiosk payments as they don't use the iframes.
● "Has Items", you will check this as Yes with GET_GO, SOUHOOLA, and SHAHRY payments as they are mandatory for them. It is optional with the other payment methods.
● "Handles Shipping", will add the shipping amount created by you to the total amount.
● "Can Debug", you can switch to yes in order to show any error occurring in the console.
● "Has Delivery", you can leave it as no as we don't handle the delivery for now.
● "Copy Link", You will click it to copy the callback URL. you will then add the URLs to your integration ID in your Accept dashboard/Developers/Payment Integrations tab by clicking on the Integration ID and then add the URL in the "Processed callback URL" & "Response callback URL".
After all these steps, click "Create" to apply this configuration and show the payment method on the checkout page.
You will find below a video to clarify all the steps to set up our Paymob's payment method.
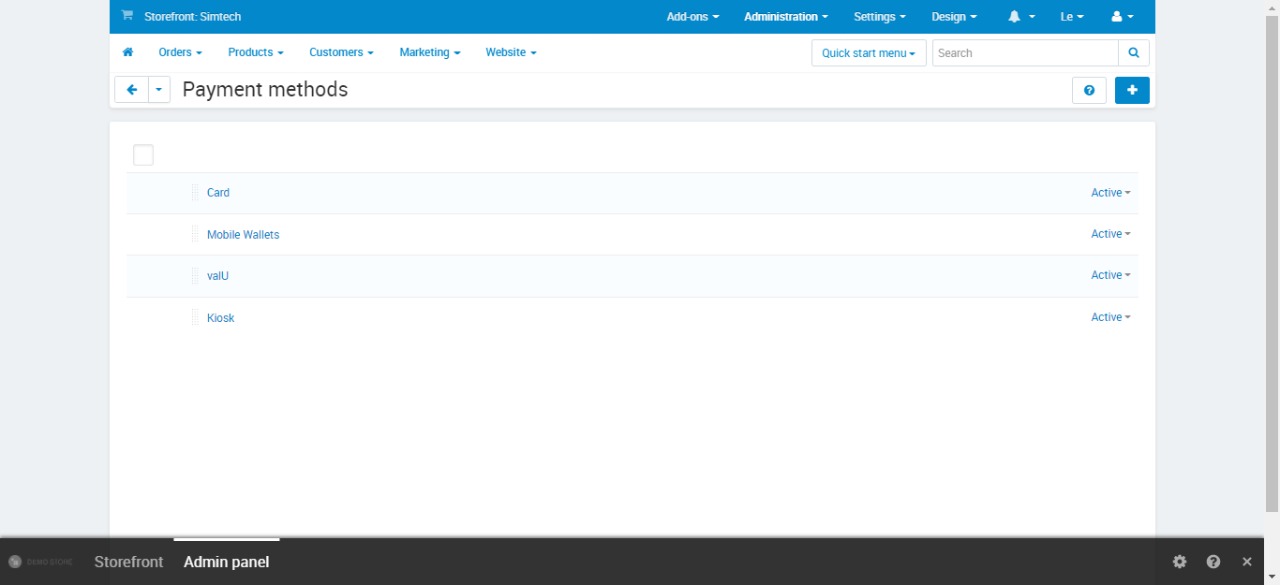
- Here are the payment methods listed. You can change their status to "Active" or "Disabled".
For each payment method, you will go through the same steps.
Use the following card test data to perform a card test transaction with your test integration ID:
| MasterCard | |
|---|---|
| Card Number | 5123456789012346 |
| Cardholder Name | Test Account |
| Expiry Month | 12 |
| Expiry Year | 25 |
| CVV | 123 |
Use the following wallet test data to perform a wallet test transaction with your test integration ID:
| Wallet No. | Wallet MPIN | Wallet OTP |
|---|---|---|
| 01010101010 | 123456 | 123456 |
Use the following valU test data to perform a valU test transaction with your test integration ID:
| valU No. | valU OTP |
|---|---|
| 01010101010 | 123456 |
Kindly check the link below for the video containing guidance to add all the payment methods on your website.
For more guidance, kindly check this video from: here
Updated 5 months ago
